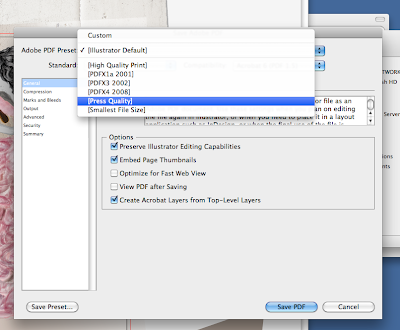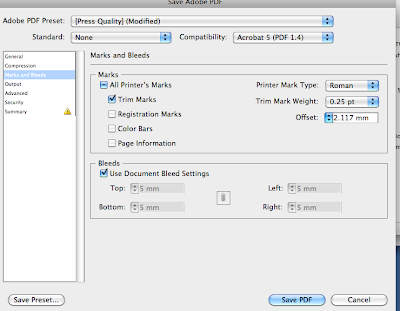
 Undecided about which of these to use for symbol techniques.


TASK 3 | Digital
The aim of Assessment Task 3 is to create a comprehensive fashion techniques catalogue that showcases research and visual examples of TWO chosen Illustrator or Photoshop technique covered in class. The content to go within this catalogue will be gone through in class and include written and visual elements of your own development. You will continue to work in Illustrator & PhotoShop to create and manipulate imagery and lay it out in Illustrator where you will build a document to export as a press ready multi page PDF. The format of the catalogue is A5, 12 pages max per technique and to be professionally printed. This will be arranged in class with cost details to be provided shortly.
You will need to:
Research and Plan Your Concept.
Select TWO of the techniques covered in class or select several of your own choice. Examples of possible techniques may include brushes, patterns, symbols, patterns etc. Consider how you wish the viewer to experience your catalogue and how your chosen concept would best be presented in this A5 format.
Use ‘flow’ thumbnails to help visualise the layout of the document Decide on the amount and type of descriptive annotation to be included
Demonstrate competence in specific skills and techniques taught in digital workshops
Inspired by your chosen research area create visuals and two illustration im- ages that show evidence of the techniques you have showcased. Imagine you are explaining how to use a certain techinique to someone that is not familiar with it. Use visual examples to support your written instructions.
Clearly communicate your designs and personal style using digital media to show off your fashion designs and personal style
Consider ways in which you can make your documents user-friendly while retaining a high level of professionalism by utilising consistent navigation, clear layouts, easy-to-read text, spell checking, choice of content
OUTCOMES • Clarity, insight, articulation and presentation of chosen design • Appropriateness of catalogue layout • Visual effectiveness of typography and graphic handling • Communicate concepts clearly and effectively throughout your design • Class attendance, professionalism and ability to meet scheduled deadlines • Presentation of printed material and management of digital files
SUBMISSION DATE: 12.30am Week 14 ASSESSMENT WEIGHTING: 50% of subject grade
SUBMISSION REQUIREMENTS - press ready pdf files of printed work
- Submit files on CD and to the Dropbox
- All print copies, CDs and files must be clearly identified with your name eg. 2011_lastnameinitial_task3.pdf
- Do not burn your CD until the final checking, completed in class, has been completed and any errors remedied
- PDF multi page files must be under 20mbUTS 83344 F&T: ADVANCED DRAWING & DIGITAL MEDIA
SUBMISSION DATE: 11.30am Week 10 (30th March2011)
SUBMISSION REQUIREMENTS - printed A3 exhibition poster - press ready pdf files of printed work - digital multi page research PDF
- Submit printed work in an A3 plastic sleeve
- Submit files on CD and to the Dropbox
- All print copies, CDs and files must be clearly identified with your name eg. 2011_lastnameinitial_task2.pdf
- Do not burn your CD until the final checking, completed in class, has been completed and any errors remedied
ASSESSMENT CRITERIA
- Clarity, insight, articulation and visual effectiveness of PDF research document
- Visual effectiveness and technical competence of A3 poster
- Communicate concepts clearly and effectively through a process blog
- Class participation, professionalism and ability to meet scheduled deadlines
- Presentation of printed material - Management of digital files
ASSESSMENT WEIGHTING: 30% of subject grade
NOTES
Pick 2 techniques that you like, that fit with your visual style.
Max 12 pages for each technique, no minimum.
Text should be simple, point form.
Going from start to finish of using a tool, think about how clear you can make this.
Use image that you create as a reference for the technique you're doing.
For next week - choose techniques. Find reference images - make sure this matches the technique you want to do.
Distortion, brushes, gradients.


